layui-github
layer文档
layer.comfirm弹窗按钮文字和事件
layui表格的复选框全选和单选的功能-全选所有分页的数据
表格需要导出的,导出时,要将自定义的复选框去除
1 2 3 4 { field: 'checkbox' , title: '<input type="checkbox" lay-filter="allAccountList" lay-skin="primary">' , width: 66 ,templet: function (res){ return '<input type="checkbox" data-id="' + res.id +'" lay-filter="accountList" lay-skin="primary">' }}
1 2 3 4 5 6 7 8 9 10 11 12 13 14 15 16 17 18 19 20 21 22 23 24 25 26 27 28 29 30 31 32 33 34 35 36 37 38 39 40 41 42 43 44 45 46 47 48 49 50 51 // 监听全选复选框 form.on('checkbox(allAccountList)' , function (data){ if (!list.length) { $('input[lay-filter="allAccountList"]' ).prop('checked' , false ); } // 是否全选 var isAll = data.elem.checked ? true : false ; // 是否被选中 if (isAll) { ids = list.map(function (item){ return item.id; }) } else { ids = []; } // 更新复选框样式 $('.layui-table input[type="checkbox"]' ).prop('checked' , isAll); // 重新渲染 form.render('checkbox' ); }); // 监听单选复选框 form.on('checkbox(accountList)' , function (data){ // 是否被选中 var isChecked = data.elem.checked; // 是否全选 var isAll = false ; // 当前项的id var _id = $(data.elem).data("id" ); if (isChecked) { // 追加 ids.push(_id); isAll = (ids.length == list.length) ? true : false ; } else { // 减去 var index = ids.indexOf(_id); ids.splice(index, 1); isAll = false ; } // 更新全选复选框的样式 $('input[lay-filter="allAccountList"]' ).prop('checked' , isAll); // 重新渲染 form.render('checkbox' ); });
layui表格复选框全选-全选当前页面(layui自身功能) 触发复选框选择
1 2 3 4 5 6 table.on('checkbox(test)', function(obj){ console.log(obj); //当前行的一些常用操作集合 console.log(obj.checked); //当前是否选中状态 console.log(obj.data); //选中行的相关数据 console.log(obj.type); //如果触发的是全选,则为:all,如果触发的是单选,则为:one });
数据操作
1 2 3 4 5 // 获取选中数据 var checkStatus = table.checkStatus('idTest') ,data = checkStatus.data; layer.alert(JSON.stringify(data));
1 2 3 4 5 //获取选中数目 var checkStatus = table.checkStatus('idTest') ,data = checkStatus.data; layer.msg('选中了:'+ data.length + ' 个');
1 2 3 4 //验证是否全选 var checkStatus = table.checkStatus('idTest'); layer.msg(checkStatus.isAll ? '全选': '未全选')
移动端,点击日期插件不显示 解决方法:加上,trigger: ‘click’ //采用click弹出
1 2 3 4 5 6 7 8 9 10 11 12 13 laydate.render({ elem: '#compareTime' //指定元素 , type : 'date' , max: endTime , min: minTime , trigger: 'click' //采用click弹出 , done : function (value, date , endDate) { .... }, ready: function (date ){ ..... });
判断复选框是否选中(获取复选框的值) 设置layer-alert和layer-comfirm为不可resize layui表格固定表头 给表格设置高度
1 2 3 4 5 table.render({ elem: '#hourData' , data: res , height: 330 });
导出excel表格 1 2 3 4 5 6 7 var ins1 = table.render ({ elem: '#demo ' ,id: 'test' ... }) // 将上述表格示例导出为csv文件 table.exportFile(ins1.config.id,data) ; // data为该实例中的任意数量的数据
例子:
1 2 3 4 5 6 7 8 9 10 11 12 13 14 15 16 17 18 19 20 21 22 23 24 // 渲染表格 function table_list(list){ var cols = getIndexs(); console.log(cols); table.render({ elem:"#campaigninfo_ table' , page: true // 开启分市 , id:"campaigninfoTable" , title:”推广活动详情" , cols: [cols] , data: list }); }; // 导出按钮 $(".down-file").click(function() { var cols = getIndexs(); var arr = [] ; for(var i = 0; i< cols.length; i++) { arr.push(cols[i].title); } // 导出所有数据,所以用返回的全部数据 table.exportFile("campaigninfoTable", list, 'xls'); // 默认导出csv, 也可以为: xls })
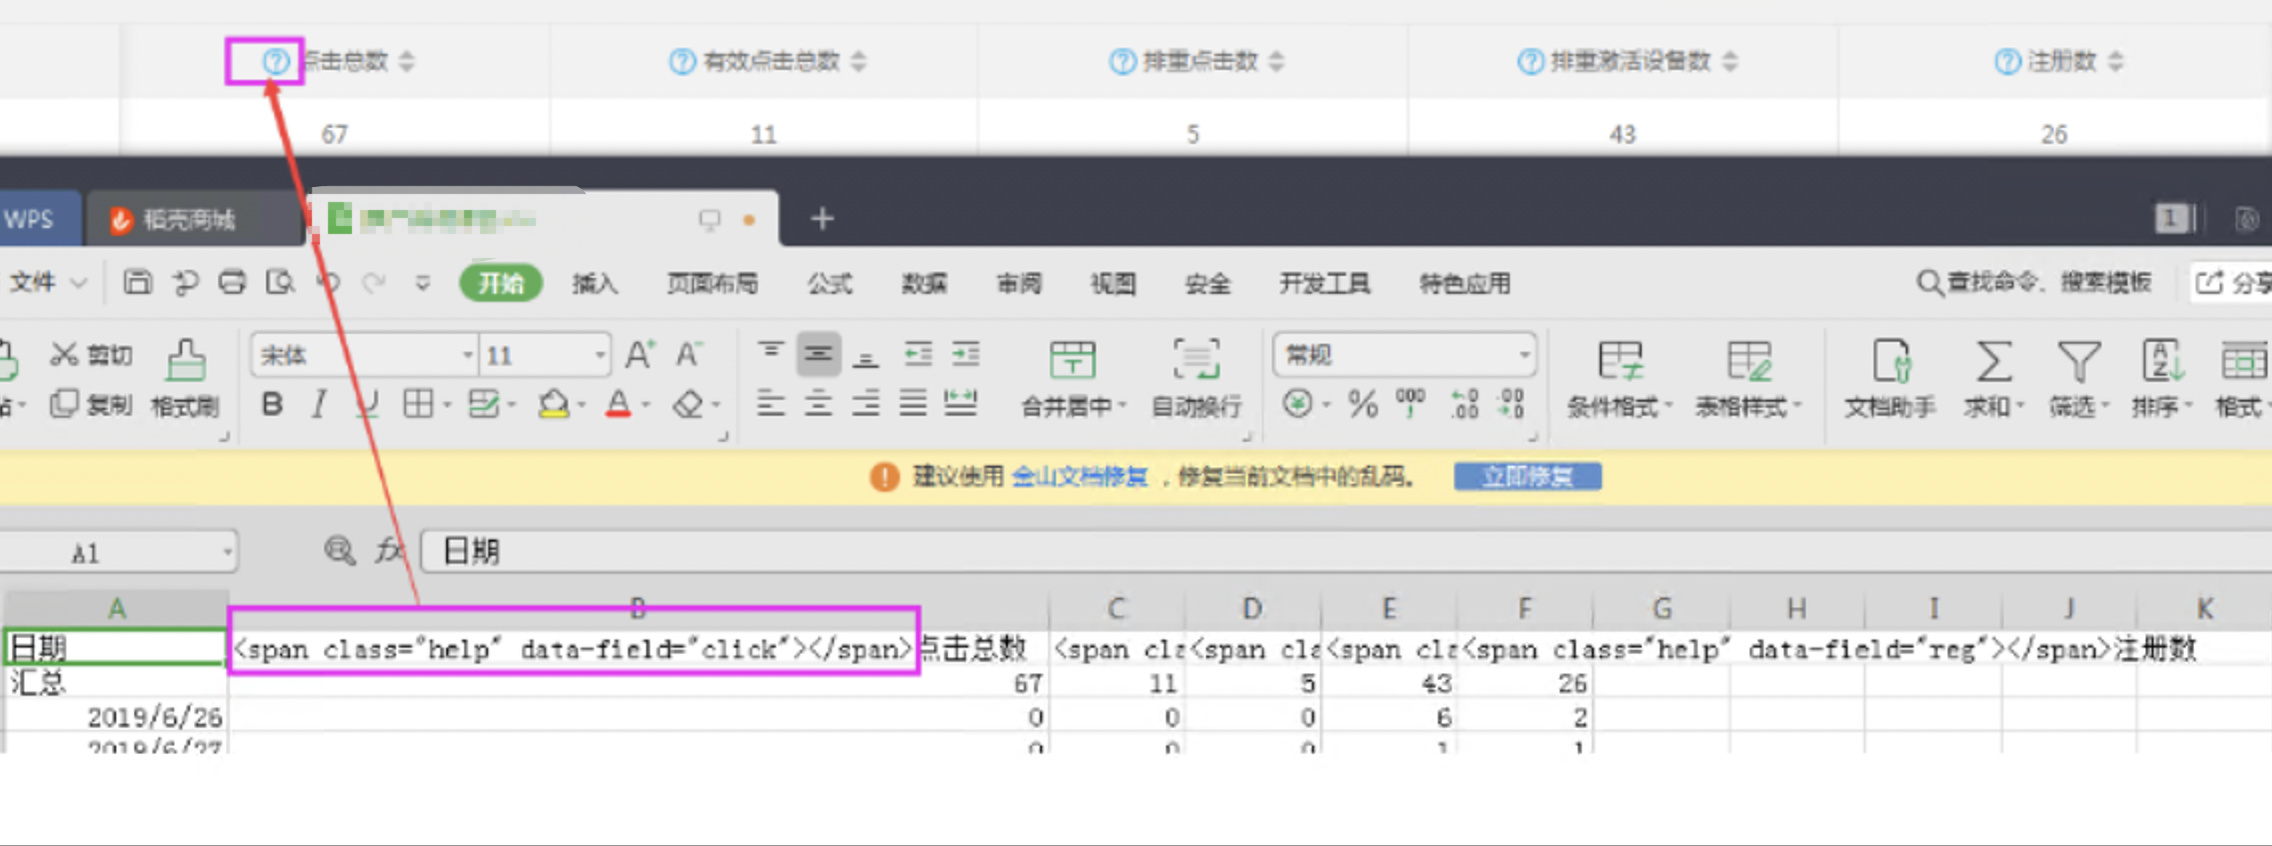
导出excel表格时,去掉页面表头显示的小图标
1 2 3 4 5 6 7 8 9 10 11 12 13 14 15 16 17 18 19 20 21 var campaigninfoTable; // 渲染表格 function table_list(list){ var cols = getIndexs(); // 不受影响的表头 var colsold = $.extend(true,[],cols); campalgnintoTable = table.render( { elem:'#campaigninfo_table' , page: true // 开启分页 , cellMinwidth: 160 , id: "campaigninfoTable” , title: "推广活动详情” , cols:[colsold] , data: list , done: function (res, curr, count) { // 表格头部样式处理 tableHeaderscroll(" #campaigninfo table", count); // 分页的显示隐藏 } });
1 2 3 4 5 6 7 8 9 10 11 12 13 14 15 16 17 18 19 20 21 22 23 function downloadTable(tableobj, tableId, data) { // 循环表头,将图标去掉(下载表格前,将图标去掉) var colsNew = table0bj.config.cols[0]; var colsold = $.extend(true,[] , colsNew); for (var item in colsNew){ var title = colsNew [item]['title']; if (title.index0f("</span>") > -1) { var arr = colsNew[item]['title'].split("</span>"); colsNew[item]['title'] = arr[1]; } } // 设置新表头 table0bj.config.cols[0] = colsNew; if (data.length){ // 导出所有数据,所以用返回的全部数据 layui.table.exportFile(tableId, data,'xls'); // 默认导出csV,也可以为: xls // 设置有图标表头 table0bi.config.cols[0] = cols0ld; }else{ layer.msg('暂无数据'); } });
点击下载时,将表格的头部图标去掉,执行了下载表格的函数之后,将表头的图标加上。
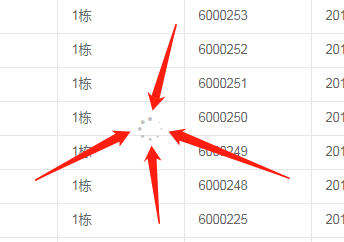
修改重载表格时的加载图标
如果只修改样式
1 2 3 4 .layui-table-view .layui-table-init .layui-icon-loading{ font-size: 60px; color: #666; }
如果不想页面显示表格加载图标
1 2 3 .layui-table-view .layui-table-init .layui-icon-loading{ display: none !important; }
表格表头标题之间边框不显示 ie浏览器,layui表格的表头不显示边框
th本来是position:relative;改为position: static;
1 2 3 .layui-table td, .layui-table th{ position: static\9; }
修改了layui表格的内容,不刷新页面,只刷新表格内容,页码不刷新解决方法 1 2 3 4 5 6 7 8 9 10 11 12 13 14 15 16 function render_table(tabledata, cur) { ········· , page: { curr: cur } , data: tabledata ········· } //获取当前页 var curr = $(".layui-laypage-skip input").val(); //重新渲染表格 <!-- res.data:修改数据后,重新返回渲染表格的数据 --> <!-- 从curr页开始渲染表格 --> render_table(res.data, curr);
layui同时清空多个表单元素的值 1 2 3 4 5 6 7 8 9 10 11 1、 form 加上 lay-filter属性 lay-filter="group_form" 2、 $("#cancel").click(function() { form.val("group_form", { "sdk": "", //单选框清空不了 "name": "", //输入框可以清空 "sort": "", //复选框清空不了 "ddddd": "", //下拉框可以清空 "password": "" //密码框可以清空 }) })
将MD5定义成layui的模块 扩展一个 layui 模块
1、在md5的js文件最后加上:
1 2 3 layui.define(function(exports){ exports('mymd', {}); });
2、如果mymd.js文件放在与使用它的html文件同一个目录下,在html文件中直接使用:
1 2 3 4 5 6 7 //使用拓展模块 layui.use(['mymd'], function(){ var mymd = layui.mymd; mymd.hash = md5; //md5加密方法 console.log(mymd.hash("md5加密")); });
3、如果mymd.js文件放在与使用它的html文件不同目录下,在html文件中要在 extend 指定路径:
1 2 3 layui.extend({ mymd: './js/mymd' })
再使用:
1 2 3 4 5 6 7 //使用拓展模块 layui.use(['mymd'], function(){ var mymd = layui.mymd; mymd.hash = md5; //md5加密方法 console.log(mymd.hash("md5加密")); });
laypage 1 2 3 4 5 6 7 8 9 10 11 12 13 14 15 layui.use(['laypage', 'layer'], function(){ var laypage = layui.laypage ,layer = layui.layer; //完整功能 laypage.render({ elem: 'demo7' ,count: 100 ,layout: ['count', 'prev', 'page', 'next', 'limit', 'skip'] ,jump: function(obj){ console.log(obj) } }); });
layui日期时间段的设置,开始时间-结束时间 1 2 3 4 5 6 7 8 9 10 11 12 13 14 15 16 17 18 19 var nowTime = new Date( ).valueOf( ); var start = laydate.render({ elem: "#start", min: nowTime, done: function(value, date) { endMax = end.config.max; end.config.min = date; // 根据开始时间来设置结束时间的最小值/最大值 end.config.min.month = date.month - 1; } }) var end = laydate.render({ elem: "#end", min:nowTime, // 结束时间初始化的时候要设置一个值,不然开始时间的回调中,设置了也不起作用。初始化的时候就要写上nowTime这个,不然动态控制不了 done: function(value, date) { } })
修改开始时间和结束时间之间的符号 方法:修改laydate.js文件里面的t.range = “-“为t.range = “/“
修改layui/lay/modules/laydate.js:
1 (t.range === !0 && (t.range = '/')) 改为: (t.range === !0 && (t.range = '-'))
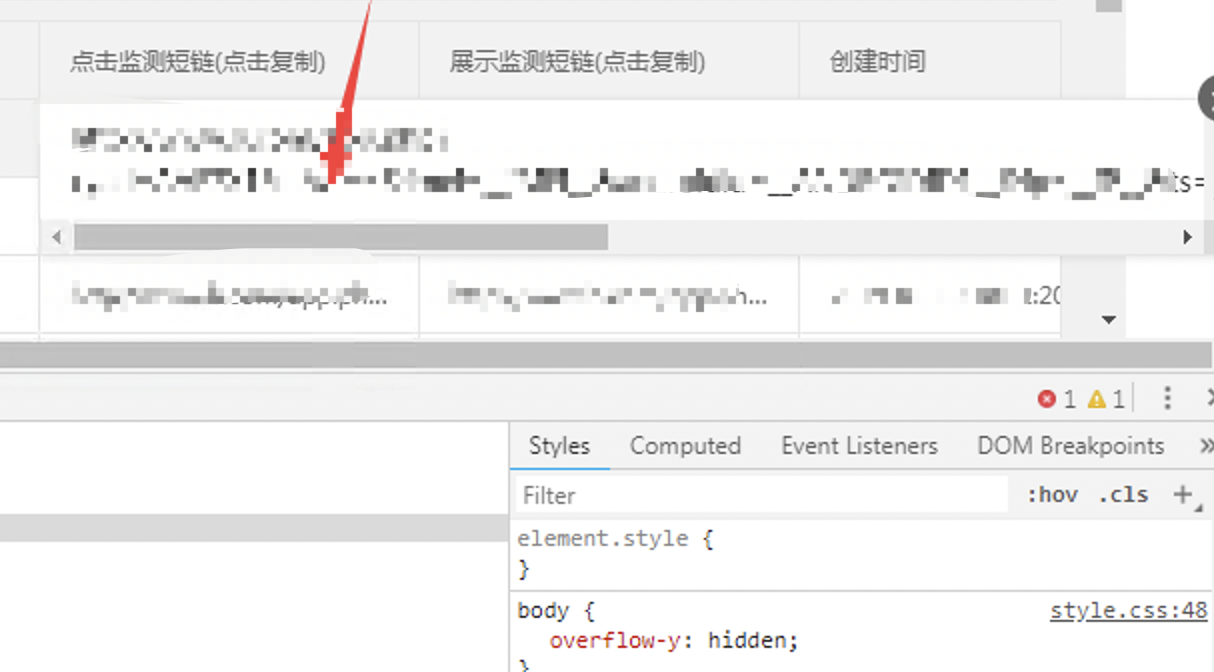
laytui表格内容超过表格长度的处理 当表格单元格的文字的长度超过表格当前列的宽度时,点击单元格的内容,会出现如图问题:
解决方法(使用css样式控制它隐藏):
1 2 .layui-table-tips-main{display:none} .layui-table-tips-c{display:none}
https://www.cnblogs.com/pyspang/p/11164736.html
https://www.cnblogs.com/xxzb/p/12618226.html
layui分页插件,一直在调用方法的解决办法
(死循环)
由于每次加载时都会执行jump回调,所以初次不让它执行jump里的方法(!first)
1 2 3 4 5 6 7 8 9 10 11 12 13 laypage.render({ elem: 'demo8' , count: totalCount , layout: ['count', 'prev', 'page', 'next', 'limit', 'refresh', 'skip'] , jump: function (obj, first) { //模拟渲染 page = obj.curr; limit = obj.limit; if (!first) { //执行方法 } } });
渲染动态表头 1 2 3 4 5 6 7 8 9 10 11 12 13 14 15 16 17 var dynamicCols = []; //用来存放动态表头 var colsList = []; //表头列表 $(数据返回的表头数组).each(function (i, item) { //设置表头 var info = { field: item.field, title: item.title }; colsList.push(info); } dynamicCols.push(colsList); //执行渲染 table.render({ elem: "#demo" //指定原始表格元素选择器(推荐id选择器) ,height: 315 //容器高度 ,cols:dynamicCols //设置表头 //,..... //其他参数 });
动态修改layui的select框的值 例如:点击表格的编辑按钮,获取当前行数据,根据不同的系统名称,在弹出的弹窗中,将系统选中
1 2 3 4 5 6 7 8 9 10 11 12 <form class="layui-form" lay-filter="whitelistForm"> <input type="text" name="whiteKey" placeholder="搜索设备名" autocomplete="off" class="layui-input"> </form> // 点击表格的编辑按钮 .... else if(obj.event === 'edit') { var dataValue = data.system === 'iOS' ? '1' : '2'; // 方法一或方法二的代码 } .....
方法一:
1 form.val('whitelistForm', {'whiteKey': dataVale});
方法二:
1 2 3 4 // 首先需要使用lay-value来确定需要设置哪个元素自动选择 var select = 'dd [ lay-value=' +data.id + ']'; // 触发点击事件,实现自动选择 $("input[ name='system']").siblings("div.layui-form-select").find('dl').find(select).click();
layui日期时间段的设置,开始时间-结束时间 最小值最大值动态设置的问题
1 2 3 4 5 6 7 8 9 10 11 12 13 14 15 16 17 18 19 20 21 22 23 24 25 26 27 28 29 30 31 32 33 34 35 36 37 /* ----日期初始化-开始---- */ $("#baseTime").val(today); $("#compareTime").val(adDate.getDate(-1)); // 前一天 // 基础日期 laydate.render({ elem: '#baseTime' , type: 'date' , min: minTime , max: today , trigger: 'click' // 采用click弹出 , done: function (value, date, endDate) { ...... } }); // 对比日期 laydate.render({ elem: '#compareTime' , type: 'date' , min: minTime , max: today , trigger: 'click' // 采用click弹出 , done: function (value, date, endDate) { ..... }, ready: function(date){ var y = date.year , m = date.month , d = date.date; m = (m < 10) ? '0' + m : m; d = (d < 10) ? '0' + d : d; // 获取输入框上一次的日期 compareTime = y + '-' + m + '-' + d; } });
1 2 3 4 5 6 7 8 9 10 11 12 13 14 15 16 17 18 19 20 21 22 23 24 25 26 27 28 29 30 var today = adDate.getDate(0); // 今日(封装的一个方法) // 激活时间段日期选择 var activeTime = laydate.render({ elem: '#actRange' , type: 'date' , range: true , max: today // 最大值为今天 , trigger: 'click' // 采用click弹出 , done: function (value, date, endDate) { // 设置付费时间段最小日期 payRange.config.min = { year:date.year, month:date.month - 1, date:date.date } ...... } }); // 付费时间段选择 var payRange = laydate.render({ elem: '#payRange' , type: 'date' , range: true , min: today , max: today , trigger: 'click' // 采用click弹出 , done: function (value, date, endDate) { ..... } });
文件上传 upload模块 多次上传同一文件,不弹报错信息
场景:1.选择错误格式的文件(a.jpg),弹出错误提示”文件格式不对“;2.再次选择a.jpg,就不弹错误提示;
3.在1的基础上,选择其他文件(b.jpg),会弹错误提示
解决:需要清空file中的value值。如果值是一样的(也就是选择同一个文件),不会执行判断,所以弹出错误提示时,需要将它的value值清空
1 2 3 4 5 6 7 8 9 10 11 12 13 14 15 16 17 18 19 20 21 22 23 24 25 26 27 28 29 30 // 重新上传签名文件按钮 upload.render({ //允许上传的文件后缀 elem: '#uploadSign' , url: '' , accept: 'file' //普通文件 , auto: false , bindAction: '#uploadFile' // , exts: 'keystore|jks' //只允许上传文件 (这样写会调用layui本身的文件上传错误提示) // , size: 1024 //限制文件大小,单位 KB , done: function(res){ // 成功回调 } ,choose: function(obj){ obj.preview(function(index, file, result){ var suffix = file.name.split(".")[1] // 文件后缀 , want_type = (suffix === 'keystore' || suffix === 'jks') // 只允许上传文件的格式 , want_size = file.size <= 1024 * 1024 // 文件最大大小 , flag = want_type && want_size // 是否符合上传条件 , error_msg = !want_type ? '上传的签名文件的格式不对' : (!want_size ? '签名文件不能超过1.00MB' : ''); // 错误提示 if(flag) { obj.upload(index, file); // 满足条件调用上传方法 } else { layer.msg(error_msg, {time: 1000}); // 清空file中的值(避免多次上传同一文件,不弹错误提示) $('input[name="file"]').val(''); } }); } });
动态修改复选框的选中状态 1 2 3 4 5 6 7 if ($('.xxxx').attr("checked") === "checked") { //判断是否选中 //设置选中 注意这里使用的是prop(), 这里要是使用了attr()是无效的 $('.xxxx').prop("checked", true); } else { $('.xxxx').prop("checked", false); } form.render(); //重新渲染 ————————最重要的记得加上这句话---------
1 2 3 4 5 6 7 8 9 10 11 12 13 14 15 16 17 18 19 20 21 22 23 24 25 26 <table id="activity-manage" lay-filter="packageList"></table> var activityManage = table.render({ elem: '#activity-manage' , id: "activityManage" , cellMinWidth: 130 ..... }); //监听数据表格的复选框 table.on('checkbox(packageList)', function (obj) { console.log(obj.type); //如果触发的是全选,则为:all,如果触发的是单选,则为:one console.log(obj); // 这里的data数据只针对当前选中的那一项 // 选择状态 (activityManage是config里面的id) var checkStatus = table.checkStatus("activityManage"); console.log(checkStatus.data) //获取选中行的数据 console.log(checkStatus.data.length) //获取选中行数量,可作为是否有选中行的条件 console.log(checkStatus.isAll ) //表格是否全选 console.log(checkStatus); // 这里的data,是当前已选中的所有数据的数组集合 ......... });
动态设置下拉框的值 1 2 3 4 5 6 7 8 9 10 //设置下拉框默认选项 form.val("deviceManage", { "os": 2 }); <form class="layui-form margin-t10" action="" lay-filter="deviceManage" id="white_device"> <select name="os" lay-filter="os"> <option value="1">iOS</option> <option value="2" selected>Android</option> </select> </form>
提示信息弹完再做其他操作(处理新增/编辑页面跳转这种情况) 1 2 3 4 5 6 7 8 layer.msg(res.msg, {time: 1000}, function() { // 可点击 $("#submitBtn").removeAttr("disabled"); if ( res.code == 1 ){ $.form.href("{:url('xy/account/role')}"); } });
动态修改单选框的值 1 2 3 4 $('input[name="isDiscount"][value="0"]').prop('checked', true); form.render("radio"); // 需要用到prop('checked', true);
1 2 3 form.val("addpackage", { "isDiscount": 0 });
xmSelect下拉多选
xm-select文档
接口处理完,弹出提示,提示语结束才跳转页面 1 2 3 4 5 6 layer.msg(res.msg, {time: 1000}, function(){ // 成功-页面跳转 if(res.code == 1) { $.form.href("{:url('xy/account/index')}"); } });
layui获取已选复选框的值 1 2 3 4 var arr_box = []; $('input[type=checkbox]:checked').each(function() { arr_box.push($(this).val()); });
初始化表格渲染条数 1 2 3 4 table.init('data-detail', { limit: 10 //注意:请务必确保 limit 参数(默认:10)是与你服务端限定的数据条数一致 //支持所有基础参数 });
获取表单提交的数据 1 2 3 4 5 6 <button href="javascript:;" class="layui-btn layui-btn-normal" lay-submit lay-filter="setAuthority">保存</button> form.on('submit(setAuthority)', function(data){ var param = data.field; ...... });
注:对应的提交按钮,要添加 lay-submit 属性
Tab的切换功能,切换事件监听等,需要依赖element模块 1 2 3 layui.use(['element'], function () { var element = layui.element; });
防止表单多次提交 1 2 3 4 // 设置提交按钮不可点击 $("#submitBtn").attr("disabled", true); $("#submitBtn").removeAttr("disabled");
1 2 3 4 5 6 7 8 9 10 11 12 13 14 15 16 17 18 19 20 21 22 // 监听保存按钮 form.on('submit(save)', function(data){ var params = data.field; // 设置提交按钮不可点击 $("#submitBtn").attr("disabled", true); // 请求接口处理 $.post('/xy/account/roleAdd', params, function(res){ layer.msg(res.msg, {time: 1000}, function() { // 可点击 $("#submitBtn").removeAttr("disabled"); if ( res.code == 1 ){ $.form.href("{:url('xy/account/role')}"); } }); return false; }); return false; });
layui表格合并行 1 2 3 4 5 6 7 8 9 10 11 12 13 14 15 16 17 18 19 20 21 22 23 24 25 26 27 28 29 30 31 32 33 34 35 36 37 38 39 40 41 42 43 // 表格合并行 function merge(res, names, indexs) { var data = res.data; //定位需要添加合并属性的行数 var mergeIndex = 0; //这里涉及到简单的运算,mark是计算每次需要合并的格子数 var mark = 1; //需要合并的列名称 var columsName = names; //需要合并的列索引值 var columsIndex = indexs; //这里循环所有要合并的列 for (var k = 0; k < columsName.length; k++) { //所有行 var trArr = $(".layui-table-body>.layui-table").find("tr"); //这里循环表格当前的数据 for (var i = 1; i < res.data.length; i++) { //获取当前行的当前列 var tdCurArr = trArr.eq(i).find("td").eq(columsIndex[k]); //获取相同列的第一列 var tdPreArr = trArr.eq(mergeIndex).find("td").eq(columsIndex[k]); //后一行的值与前一行的值做比较,相同就需要合并 if (data[i][columsName[k]] === data[i-1][columsName[k]]) { mark += 1; //相同列的第一列增加rowspan属性 tdPreArr.each(function () { $(this).attr("rowspan", mark); }); //当前行隐藏 tdCurArr.each(function () { $(this).css("display", "none"); }); }else { mergeIndex = i; //一旦前后两行的值不一样了,那么需要合并的格子数mark就需要重新计算 mark = 1; } } mergeIndex = 0; mark = 1; } }
layui-layer 遮罩 弹出层区域默认自带0.3透明度的黑色背景蒙层
layer.load(icon, options) - 加载层
1 2 3 4 5 6 7 8 //eg1 var index = layer.load(); //eg2 var index = layer.load(1); //换了种风格 //eg3 var index = layer.load(2, {time: 10*1000}); //又换了种风格,并且设定最长等待10秒 //关闭 layer.close(index);
1 2 3 4 5 6 7 8 9 10 11 12 13 14 15 16 17 18 19 20 21 22 23 24 25 26 27 28 29 30 layui.use('laydate', function(){ var laydate = layui.laydate; // 开始日期 var startDate = laydate.render({ elem: '#startDate' ,max : "2099-12-31" ,done: function(value,date){ endDate.config.min ={ year :date.year ,month: date.month-1 ,date: date.date }; // 可不加,根据需求来 $('#endDate')[0].focus(); } }); // 结束日期 var endDate = laydate.render({ elem: '#endDate ' ,min: "1900-1-1" ,done: function (value,date) { startDate.config.max={ year :date.year ,month: date.month-1 ,date: date.date } } }); });
如果想去掉表单中所有输入框的浏览器历史记录 直接给form元素加上autocomplete=”off”
1 <form autocomplete="off"></form>
layer弹两次 1 2 // 加上id-处理提示弹两次 layer.msg('复制成功', {id: 'clipboard', time: 1000});
layui表格没有数据的时候,表头没有横向滚动条
1 2 3 修改一下table.js源码 that.layMain.find('tbody').html(''); that.layHeader.css('overflow','auto');//新加的
Layui数据表格显示无数据提示问题
layui-排序功能 如果不使用layui本身的前端排序功能,需禁止:
1 ,autoSort: false // 禁用前端自动排序
更新全部表单元素:
扩展一个模板 1 2 3 4 5 6 7 8 9 10 11 12 13 14 15 16 17 18 19 20 21 22 23 24 /**扩展一个模块**/ layui.define(function(exports){ var obj = { hello: function(str){ alert('Hello '+ (str||'mymod')); }, }; // 输出接口 exports('mymod', obj); }); layui.extend({ mod2: 'http://192.168.0.59/mymod/' // {/}的意思即代表采用自有路径,即不跟随 base 路径 }); // 使用拓展模块 layui.use(['mymod'], function(){ var mymod = layui.mymod; mymod.hello('World!'); //弹出 Hello World! });
解决LAYUI数据表格中嵌套下拉框显示问题 layui学习——数据表格嵌套下拉列表,并实现动态更新
解决layui数据表格中嵌套下拉框显示问题
Layui数据表格中使用下拉选框被遮挡的解决方法,要在表格渲染中操作
1 2 3 4 5 6 7 8 9 10 11 12 13 14 15 16 17 18 19 20 21 22 23 // 表格渲染 table.render({ elem: '#groupTable' , limit: 10 , cols: [[ { type: 'numbers', title: '序号', width: 100 } , { title: '下拉框', minWidth: 140 , templet: function (res) { var selectStr = '<select name="test">'; for(var i = 0; i< 10; i ++) { selectStr += '<option value="' + i+ '">' + i+ '</option>' } selectStr += '</select>' return selectStr; } } ]] , page: { curr: this_curr } , data: list , done: function (res, curr, count) { $(".layui-table-body, .layui-table-box, .layui-table-cell").css('overflow', 'visible') } });
EasyAdmin
EasyAdmin—layui mini 页面——表格内容渲染的方法在public/static/admin/js/对应页面的js文件,页面在app/admin/view
在线DEMO
表格的筛选条件使用日期格式: 使用search: 'range'
1 {field: 'create_time', minWidth: 80, title: '操作时间',search: 'range'},
表格的筛选条件使用下拉框:
使用search: 'select'
1 2 3 4 5 6 7 8 {field: 'status', minWidth: 80, title: '审核状态', search: 'select',selectList: {1: '已审核', 0: '未审核'},templet: function (d) { if(d.status == 1) { return "已审核"; }else if(d.status == 0){ return "未审核"; } }, },
操作栏 1 2 3 4 5 6 7 8 9 {field: 'account_ban_status', title: '操作内容', minWidth: 80, templet: function (d) { if(d.status == 0) { return "注销账号"; } if(d.status == 1) { return "恢复账号"; } }, },
切换左侧导航栏或Tab栏,关闭页面的二级页面(即iframe中的弹窗内容)——修改框架代码 public/static/plugs/lay-module/layuimini/miniAdmin.js
1 2 3 4 5 6 7 8 9 10 11 12 13 14 15 16 17 18 19 20 21 22 23 24 25 26 27 28 29 /** * 打开新窗口 */ $('body').on('click', '[layuimini-href]', function () { var URL = window.location.href.split("#")[1]; // 当前URL var loading = layer.load(0, {shade: false, time: 2 * 1000}); var tabId = $(this).attr('layuimini-href'), href = $(this).attr('layuimini-href'), title = $(this).text(), target = $(this).attr('target'); var el = $("[layuimini-href='" + href + "']", ".layuimini-menu-left"); layer.close(window.openTips); // 菜单地址不等于当前URL——切换到其他页面,关闭子页面内容 if(href !== URL) { var hasSecond = $('iframe[src="' + URL + '"]').contents().find('.layui-layer-iframe').length; if(hasSecond > 0) { $('iframe[src="' + URL + '"]').contents().find('.layui-layer-iframe').remove(); $('iframe[src="' + URL + '"]').contents().find('.layui-layer-shade').remove(); $('iframe[src="' + URL + '"]').contents().find('.layui-layer-move').remove(); } } ...... ...... ...... });
修改logo public/static/plugs/lay-module/layuimini/miniAdmin.js
1 2 3 4 5 renderLogo: function (data) { // var html = '<a href="' + data.href + '"><img src="' + data.image + '" alt="logo"><h1>' + data.title + '</h1></a>'; var html = '<img src="/static/common/images/logo.png" alt="logo"><h1>' + data.title + '</h1>'; $('.layuimini-logo').html(html); },
选择同一天,修改结束时间为23:59:59 1 2 3 4 5 6 7 8 9 10 11 12 13 14 15 16 17 18 19 20 laydate.render({ range: true , type: ncV.timeType , elem: '[name="' + ncV.fieldAlias + '"]' , done: function(value, date, endDate){ var arr = value.split(' - ') , day1 = arr[0].split(' ')[0] // 开始日期 , day2 = arr[1].split(' ')[0]; // 结束日期 if(day1 === day2) { // 同一天 var time1 = arr[0].split(' ')[1] // 开始时间 , time2 = arr[1].split(' ')[1]; // 结束时间 // 判断是否都为0点,若是,将结束时间改为23:59:59 if(time1 === time2 && time1 === '00:00:00'){ setTimeout(function() { document.querySelector('[name="' + ncV.fieldAlias + '"]').value = day1 + ' ' + time1 + ' - ' + day2 + ' ' + '23:59:59'; }, 150) } } } });
layui表格编辑单元格时直接点击保存按钮问题
layui表格编辑单元格–满足校验再保存-不满足校验继续展示输入框 1 2 3 4 5 6 7 8 9 10 11 12 13 14 15 // 监听单元格编辑 table.on('edit(subpackageTable)', function(obj){ console.log(obj.value); // 得到修改后的值 console.log(obj.field); // 当前编辑的字段名 console.log(obj.data); // 所在行的所有相关数据 console.log(this) // 不满足校验 if(!/^[1-9]\d*$/.test(obj.value)) { layer.msg('请输入大于0的正整数', {time: 1000}); $(this).parent('td').append('<input class="layui-input layui-table-edit"></input>'); // 因为单元格编辑,页面就是给它多了个input输入框 不满足条件时,再追加进去就可以 } });
动态修改-不满足条件的不可编辑 需求是:
输入的条件需为大于0的正整数,若满足,则设置成功,更新设置数;若不满足,提示“请输入大于0的正整数”,提示的同时,用户点击输入框外,设置失败,收起输入框,设置数显示原数(注:交互先试试,设置失败能否不收起输入框,直至输入正确,才支持收起并设置成功;)
1 2 3 4 5 6 7 8 9 10 11 12 13 // 表格渲染的done事件回调 , done: function (res, curr, count) { var _index = localStorage.getItem("edit_index"); if(_index) { $('.layui-table tr[data-index="' + _index + '"] ' + '[data-field="ip_reg_limit"]').append('<input class="layui-input layui-table-edit"></input>'); // 继续保留输入框 } for(var i in data) { if(data[i]['status'] === 3) { $('tr[data-index="' + i + '"]').find('td[data-field="ip_reg_limit"]').data('edit', false); } } }
注意:使用时,在cols中,edit要设置为text:edit: 'text',不然要验证edit事件的不起作用
1 2 3 4 5 6 7 8 9 10 11 12 13 14 15 16 17 18 19 20 21 22 23 24 25 26 27 28 29 30 31 cols:[[ { field: 'ip_reg_limit', title: '同IP注册限制数', edit: 'text', minWidth: 120, templet:function(res){ if(res.status == 3 || res.ip_reg_limit == 0){ return ''; }else { return '<a class="table-edit-btn">' + res.ip_reg_limit + '</a>'; } } } ]] // edit结束后,不管值有没有改变,都会自动重新渲染一次表格 // 监听单元格编辑 table.on('edit(subpackageTable)', function(obj){ // 判断是否为大于0正整数 if(!/^[1-9]\d*$/.test(obj.value)) { layer.msg('请输入大于0的正整数', {time: 1000}); var _index = $(this).parent('td').parent('tr').data('index'); localStorage.setItem('edit_index', _index); // 更新表格内容 updateTable(); } else { localStorage.removeItem('edit_index'); $.post('/xy/package/ban', {id: obj.data.id,ip_reg_limit:obj.value}, function(res){ layer.msg(res.msg, {time: 1000}); if(res.code == 1) { updateTable(); } }); } });
动态设置单元格是否可以编辑 $(".layui-table").find('td[data-field="advise"]').data('edit', false)
1 2 3 4 5 6 7 8 9 // doUpdate 可编辑表格的ID名 table.on('row(doUpdate)', function(obj){ // advise 需要编辑的字段名 if(obj.data.advise =='' ){ $(".layui-table").find('td[data-field="advise"]').data('edit', true) }else{ $(".layui-table").find('td[data-field="advise"]').data('edit', false) } });
textarea标签换行符以br存入数据库 ,br转 textArea换行符
textarea标签回车符是/n,在html里识别回车是<br/>,在存入数据库之前要进行转换成<br/>,在取出展示在html页面时才能显示换行。
1 2 3 var content = rules_content.replace(/\n/g,'<br />'); $("#rules_content").html(content); // 写入活动规则内容
引入之后,会报 xmSelect is not defined
解决:将以下代码注释掉即可
1 2 3 // "object" === ("undefined" == typeof exports ? "undefined": _typeof(exports)) ? e.exports = t.c: "function" == typeof define && n(220) ? define(xmSelect) : window.layui && layui.define && layui.define((function(e) { // e("xmSelect", t.c) // })),
当合并表头,动态改变列数时 只有一列时,数据会把合并的表头也展示出来,处理方式:
1 2 3 4 , done: function (res, curr, count) { $(".layui-table tbody").find(".layui-table-col-special").remove(); // 当合并表头只有一列时 }
动态改变合并表头合并列的数量时,colspan的数值的类型为字符串类型 1 2 3 var colspan_day = '1'; // colspan要使用字符串类型 ,{align: 'center', title: '次日', colspan: colspan_day }
表格表头-合并列,只有一列时,列宽设置 layui会自动在页面生成样式,自定义样式,覆盖它
注意:这种方法有个bug,从别的页面,切换到该页面,bug还是存在
1 2 3 4 5 6 7 8 9 /* 针对合并表头只有一列时 */ .laytable-cell-1-0-20, .laytable-cell-1-0-21, .laytable-cell-1-0-22, .laytable-cell-1-0-23, .laytable-cell-1-0-24, .laytable-cell-1-0-25{ width: auto !important; }
表格表头-合并列,只有一列时,合并列的文字会出现换行,默认宽度为60px 所以要给合并列加上宽度属性(根据实际情况自定义): width: 80
1 2 3 4 5 6 7 8 9 10 11 12 13 14 ,{align: 'center', title: '注册当天', width: 80, colspan: current_count} ,{align: 'center', title: '次日', width: 80, colspan: cols_count } ,{align: 'center', title: '第3天', width: 80, colspan: cols_count } ,{align: 'center', title: '第4天', width: 80, colspan: cols_count } ,{align: 'center', title: '第5天', width: 80, colspan: cols_count } ,{align: 'center', title: '第6天', width: 80, colspan: cols_count } ,{align: 'center', title: '第7天', width: 80, colspan: cols_count } ,{align: 'center', title: '第8-14天', width: 80, colspan: cols_count } ,{align: 'center', title: '第15-30天', width: 80, colspan: cols_count } ,{align: 'center', title: '第31-45天', width: 80, colspan: cols_count } ,{align: 'center', title: '第46-60天', width: 80, colspan: cols_count } ,{align: 'center', title: '第61-90天', width: 80, colspan: cols_count } ,{align: 'center', title: '第91-180天', width: 80, colspan: cols_count } ,{align: 'center', title: '第181-360天', width: 80,colspan: cols_count }
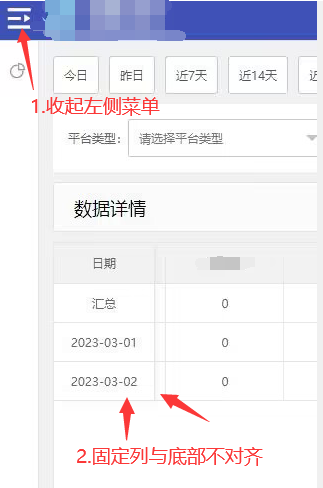
表格固定列与表格对应列不对齐 渠道回收数据:
给日期列添加unresize属性
1 {field: 'date', title: '日期', width: 100, rowspan: 2, height: 81, unresize:true, fixed:'left'}
给固定列添加宽度
1 .fx_w112 .layui-table-fixed{ width: 112px;}
动态加上fx_w112
1 2 3 4 5 6 7 8 // 修改第一列固定表头的高度 if(targets_page_len !== 0) { $('.table-container').addClass('rowspan_2').removeClass('rowspan_1'); $('.table-container').removeClass('fx_w112'); } else{ $('.table-container').addClass('rowspan_1').removeClass('rowspan_2'); $('.table-container').addClass('fx_w112'); // 修改固定列的宽度 }
给日期列添加unresize属性,是因为后面给它添加固定宽度112,如果可以拖拽修改宽度,就会矛盾。
